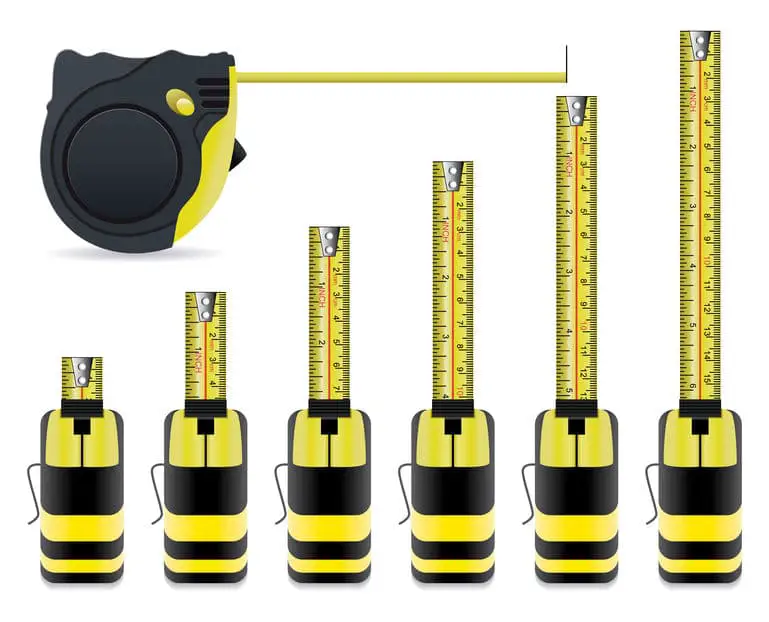
As woodworkers, we all possess at least one retractable tape measure. The tape is marked with many useful symbols that are very familiar to the construction world but may not be as familiar to us shop-bound woodworkers. Among these marks is the little black diamond that is found every 19.2 inches along the length of the tape. Just how many ways can a retractable measuring tape be used?
- Measure distance
- Measure between 2 verticals by including case size
- Measure between 2 verticals by bending
- Foot Marks
- Laying out 16” on centers
- Laying out 24” on centers
- Laying out 19.2” on centers
- Measure cantilever capabilities
- Scribe a line
- Scribe sheetrock
- Find centers
- Layout a circle
The most obvious task to perform with a measuring tape is measuring. This almost goes without saying because it is so obvious. Measuring tapes are available in a wide range of lengths. I have one that is a key chain and measure only up to 6 feet.
When I was building my house while in college, I bought one that would measure up to 100 feet. I used this to layout my foundation and later for landscaping. I have rarely used it since and cannot tell you today where it ended up. I am sure it is packed away somewhere in one of a multitude of plastic boxes after the 8 moves since.
Measuring tapes can be found in whatever increments you care to use. Metric, Inch, Cubits. Okay, maybe not cubits. I was just seeing if you were paying attention.
Common metric length units are based on the meter. For the purposes of a measuring tape, the increments are generally broken down into smaller units. The metric system breaks down in tenths of a unit.
This means that a tenth of a meter is a decameter. A tenth of a decimeter is a centimeter and a tenth of a centimeter is a millimeter. While there are smaller units than the millimeter, these units are generally referred to as part of a millimeter – at least in woodworking. For example, a half of a millimeter would be referred to as ½ millimeter or 0.5 millimeters rather than 500 micrometers.
In the Imperial and United States customary systems the measuring tape is based on the much smaller inch. An inch Is about 24.5 millimeters or 1/36th of a yard. The inch unit was not standardized until the 1950s when the definition of a yard was standardized to be 0.944 Meters long.
A major difference when dealing with smaller inch units is that inches increments are derived by dividing into halves. These results are fractions which most of the world has rejected as too complicated to learn. They might be right. A half of an inch is written as ½ inch. Half that is ¼ inch. Half that is 1/8th inch. This goes on to about 1/64 in woodworking which is considered a tight fit in woodworking. Honestly, wood might swell or shrink by that much overnight or as the weather changes.
Enough of that. Let’s go on.
1. Measure the Distance
It may not be obvious, but the typical retractable tape measure has a built-in feature that allows the user to measure inside distances as well as outside distances. The little hook on the end will actually move by a predetermined amount to compensate for the thickness of the clip in the measurement. This allows accurate measurement for both inside lengths (where the end of the tape is pushed up against something) and outside measurements (where the end of the tape is hooked onto the edge).
2. Measure between 2 verticals by including case size
You can measure between to objects (walls, studs, cabinet carcass) with accuracy by using the case of the measure itself. Many retractable tape measures come marked with the distance between the tape exit point and the other end of the case. Those that are not marked by the manufacturer can be measured and marked on the case with a permanent marker.
Then, to measure simply butt the back of the case against one object and extend the tape to the other object. Lock the tape in place and take a reading at the edge of the exit hole. Now, just add the case measurement to the tape reading and you have the inside measurement you are looking for.
3. Measure between 2 verticals by bending
When I was a sheet rocker – back in the old days – we didn’t need to be accurate enough to justify the time to lay the tape on the floor, run the tape out to the other end, lock the tape in place and then add the case measurement to the readout.
In this case, we simply pushed the tape up against the far measurement, ran the tape along the floor, and gently bent the tape into the corner we wanted to measure to. This is a little less accurate, but it was also just sheetrock. The next wall would cover up the small gap left by this quick measurement method.
4. Foot Marks
The standard Imperial tape measure will highlight each foot or 12 inches. Many tapes will also mark every inch after the foot mark with a secondary inch callout to indicate the readout. For example, 16 inches is also marked as 1 foot and 4 inches.
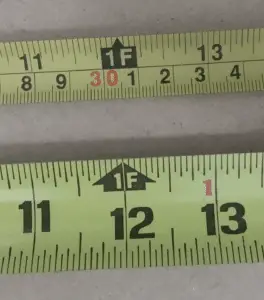
Each foot mark on the tap[e is highlighted with some form of an up arrow. Narrower tapes will highlight the foot with a square and a small peak while wider tapes will just use an upward pointing arrow.
Some manufacturers will mark these foot/inch indicators as 1FT4, 1FT5, etc. while others will simply track the inches after each foot mark.
5. Laying out 16” on centers
Every 16 inches on an imperial tape is marked with a red background. For years, the standard stud spacing in “Southern North America” for framed construction has been 16 inches on center.
Your standard imperial measuring tape will have every 16 inches marked with a red background. This mark is to help the contractor easily layout wall studs on the top and bottom plates.
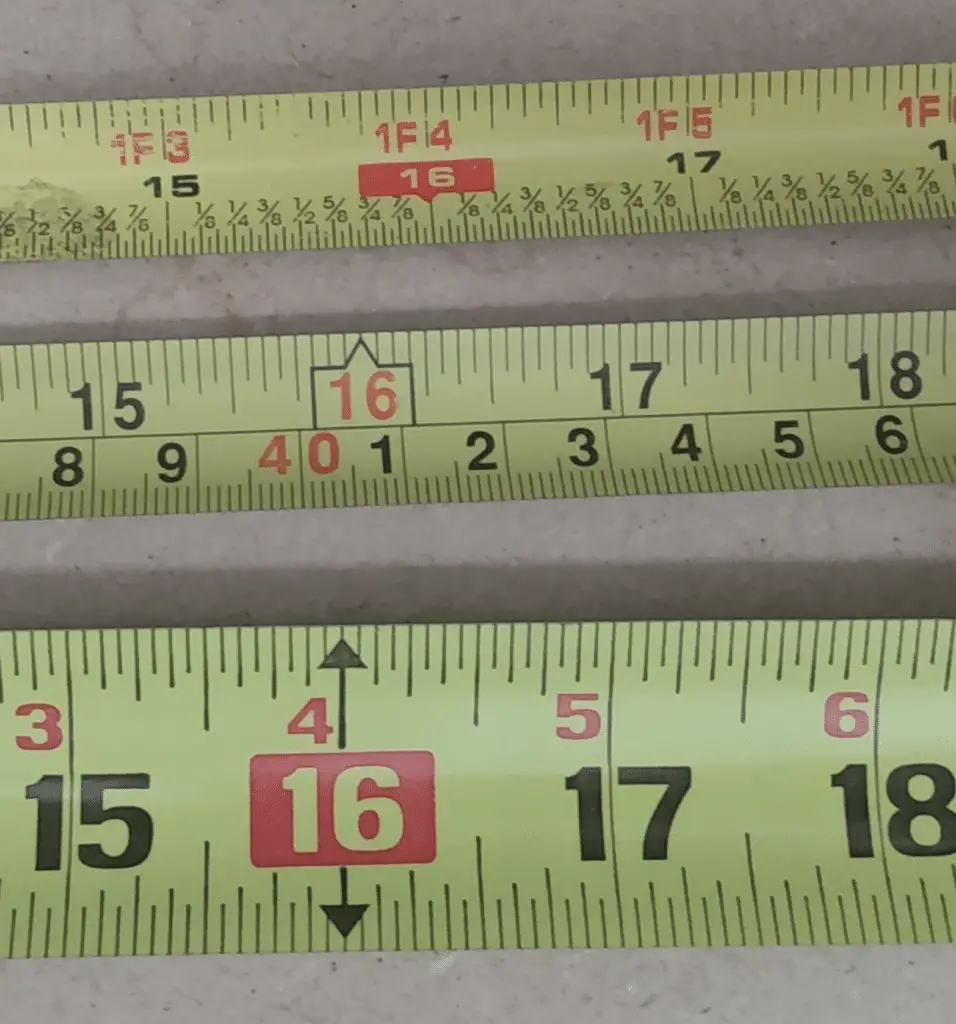
16 inches is significant because all sheet goods (in the US anyway) come in 4 x 8-foot sheets. 8 feet divided by 6 is 16 inches. Placing studs every 16 inched will allow 6 studs every 8 feet (and 3 studs every 4 feet). This makes nailing patterns easy and calls for fewer cuts to mane the sheet fit onto the studs.
In Europe, studs are laid out in 60cm intervals. Sheet goods are multiples of 60cm to allow for easy nailing patterns.
6. Laying out 24” on centers
Many times, a wall can be laid out with 24-inch centers. This allows for more insolation space and uses 2 fewer studs than the 16 inches on center construction does. This is also common on interior walls that are not load-bearing.
The 24 inches on center construction also allows for 4-foot sheet goods to be fixed to studs. 8 foot (96 inches) divided by 24 in centers provides for four studs per 8 foot and 2 studs per 4 foot of the wall.
The 24-inch centers do not have their own representation on the tape but fall on every other foot mark.
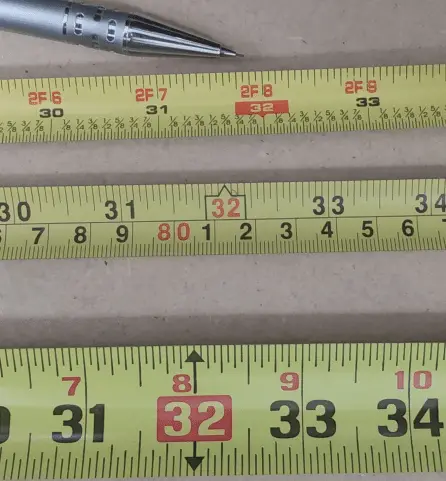
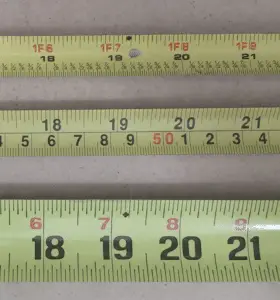
7. Laying out 19.2” on centers
Many, Many, MANY sites I ran across while investigating the black diamond swore up and down that the black diamond was meant to find the center of studs placed 16 inches On Center. This is NOT the purpose of the black diamond on your imperial tape measure. That doesn’t even make sense since 16 inches on center IS the on-center measurement.
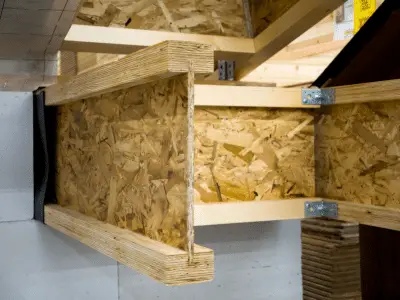
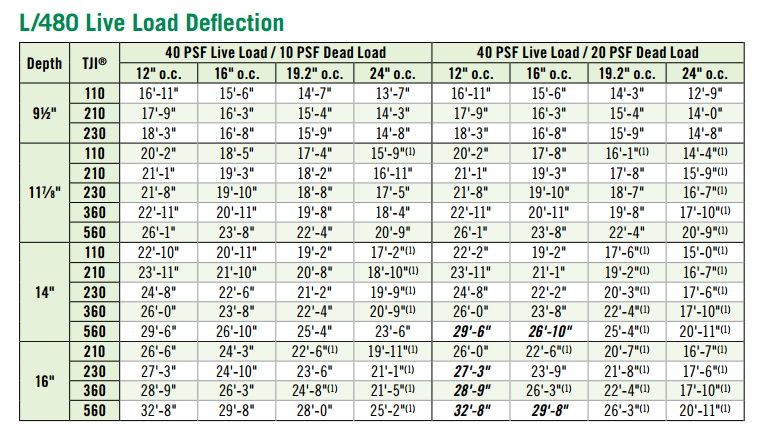
Look up any lumber yard in your area and search for engineered joists and you will find (one of) the true answers to the black diamond mystery.
The Black diamond is used to mark On Centers when 5 studs or joists are needed every 8 feet. The reason for this 19.2-inch spacing has become more popular as the construction industry has adopted engineered joists that can carry more weight and for Optimum Value Engineering to make housing more affordable.
The Black diamond is used to mark 19.2 inches on centers or 5 studs or joists every 8 feet. The reason this 19.2-inch spacing has become needed in the construction industry is 2 fold. 1.) The use of engineered joists that can carry more weight than traditional construction lumber and 2.) The rise of Optimum Value Engineering (OVE) to make housing more affordable by using less lumber.
Why use 19.2 centers?
Because wood is not a good insulator, the 19.2 inches on center spacing is used for wall framing to allow more insulation in the walls. This saves future homeowners money on heating and cooling costs. This is all discussed in the HUD document found here.
Engineered joists are also a good reason to use the 19.2-inch spacing on the floor of the house. Engineered joists can carry much more weight than regular construction lumber. This difference makes it possible to use fewer joists while maintaining the same load rating on the floor structure.
8. Measure cantilever capabilities
Measuring all alone? The retractable measuring tape is capable if cantilevering a certain distance. By this, I mean you can hole the tape in one hand, support it a few feet out with the other and achieve a rigid distance before the tape will collapse.
Wider tapes will extend further than narrow tapes and newer tapes will hold up farther out than well-used tapes. I can reach 12 feet with my 1 1/8 inch wide Stanley Fatmax. How practical is that? I don’t know but it was fun finding out.
9. Partner with a Nail Head
Maybe a better way to measure long distances by yourself is to use the slot built into the hook. This slot will accommodate a nail or screw head that can be placed near one end of the measurement then extract the tape to the other end and take your reading.
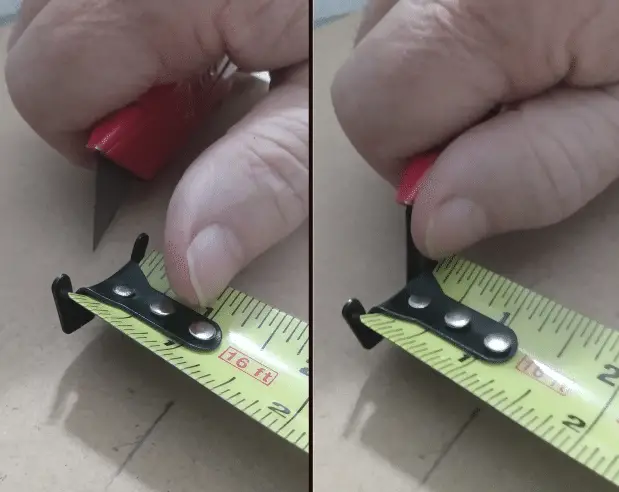
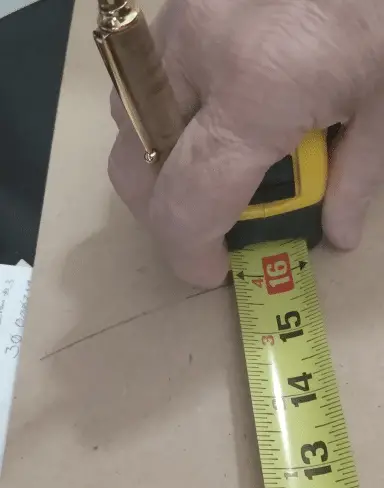
10. Mark a line with a pencil
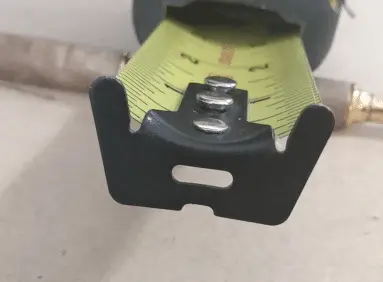
There is a little notch at the end of the hook of the tape. I am not sure exactly what that was made for, but I find it very handy to lock a pencil in and scribe a line offset from an edge. To do this,
- mark your distance on the workpiece.
- Place the pencil on the mark and pinch the hook of the tape between the pencil and your thumb.
- Make sure the point of the pencil is locked by the little notch.
- With the tape housing in your other hand, pinch the tape between the thumb and index finger of that hand and,
- Holding the tape tightly, run your index finger along the edge following with the pencil.
11. Score sheetrock
The same technique described above for scribing a line can be used to score and cut sheetrock. Trade the pencil for a utility knife and follow the same steps. After the sheetrock has been scored, bend it backward and cut the backing paper to free the newly cut sheetrock. NOTE: Utility knives are sharp.
12. Find centers
Some measuring tapes come with a half-scale set of markings on one side of the tape. The intended purpose of these marks is to allow you to find the center of the workpiece.
To do this, simply measure the total length of the workpiece on the full-scale side of the tape. Now, find that same number on the half-scale side of the tape and mark your center.
Here is one such tape I found but I do not own one.
13. Lay out a circle
Some measuring tapes will come with a pivot built into the case where you can drive a nail or screw then lock your tape at the desired radius and mark a circle. Here is a link to a 35 foot Lufkin tape measure or a 16 foot Lufkin Tape Measure with this feature.
Then simply set the radius, lock the tape, and lock your pencil into the hook at the end of the tape. Rotate the pencil until the complete circle has been created.
For the rest of us that do not have that feature, use the slot provided on the hook to slide over the head of a nail. Lock the tape at the desired radius. Firmly block a pencil vertically on the tape body and draw the circle.
I could probably come up with a few more but I have to get this posted. Maybe I will do a follow up later with some other tips and tricks.
References:
- Sciencing.com (Metric Equivalents)
- fp-supply.com (Live Load Deflection Chart)
- HudUser.gov (Optimum Value Engineering)
- fp-Supply.com (Engineered Truss Example)
- DIY-StackExchange.com (European stock sizes)