When it comes to organizing and beautifying the garage, it’s easy for money-strapped DIY enthusiasts to get discouraged. However, with pallets , you can have all the space and storage that you need. Pallets are available almost anywhere, as they’re inexpensive and robust enough for all your storage needs.
Here’s how to build garage shelves out of pallets:
- Find a pallet that’s sturdy and in good condition.
- Determine how many shelves will fit your garage wall.
- Cut boards from pallets for shelves.
- Screw the boards together to create shelving units.
- Secure the shelving units on the wall.
Keep reading for a more in-depth look at each step.
1. Find a Pallet That’s Sturdy and In Good Condition
To begin with, you’ll need to collect the materials that you’ll need to build your shelves out of pallets.
These include:
- A tape measure.
- A pry bar(s) or crowbar(s).
- Nails or screws for securing boards together (two boxes).
- Hammer or drill with an appropriate sized bit for nails/screws (electric is better than hand tools).
- Safety glasses and gloves for protection.
- Dust Half Mask Respirator <Affiliate Link>
- Shelving brackets, which you can buy or make yourself by screwing small pieces of wood together.
| NOTE: Because of international shipping requirements, some pallets may contain chemicals that may be harmful if inhaled. For this reason, it is recommended that you use a respirator any time you are sanding wood – especially pallet wood. For your convenience, I have provided this link to a respirator. |
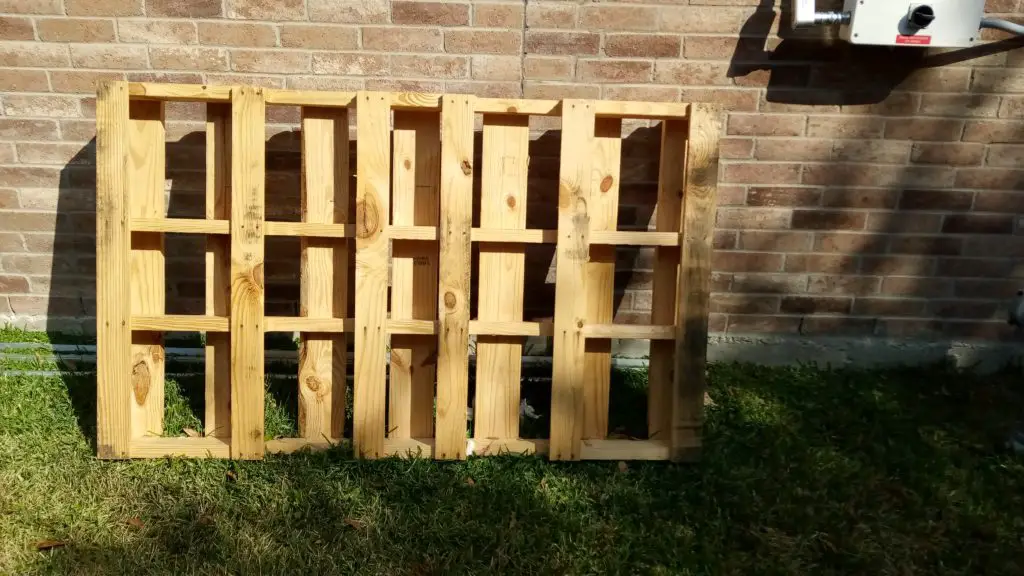
Once you’ve gathered these materials, it’s time to find a pallet. It needs to be in good condition and sturdy enough for all the weight you’ll add when placing heavy items on it, such as tools, paint cans, or other items you may need to store on the shelves.
Find used pallets behind many shipping and receiving docks at your local store or factories. Make sure to get permission before entering the property but most places will be happy to give you the pallet especially if they get charged for their removal.
To determine whether a pallet is suitable for your project, follow these guidelines:
- The pallet should be made of quality wood. More importantly, it shouldn’t have any large nicks or gashes in the boards themselves.
- There should be no pieces broken off the sides, and no rough edges that could cut into your hand when you’re carrying items back to the shelf. At least enough of the pallet to make the project from.
- The boards should fit securely and not be wobbly when you push on them.
Once you’ve found a pallet that meets the above criteria, it’s time to get started.
2. Determine How Many Shelves Will Fit in Your Garage Wall
Now that you’ve selected your pallet(s), it’s time to figure out how many shelves you will need and the wall space needed for them. To do this, you’ll need to measure your space and plan accordingly. Measure from one side of the garage wall to the other.
If there’s a car parked in front of part of it, estimate how large a section is not impeded by a vehicle. Remember to include opening the doors of the car.
Next, decide how high you’d like your shelving units stacked up above one another. They should be far enough apart that you can reach the top shelf without too much trouble, but not so far apart that you have a ton of wasted space.
Here are some guidelines to ensure your shelves will fit the garage wall perfectly:
- The lower shelves should be about 3’ (0.91 m) off the ground.
- The middle shelves should be about 5’ (1.52 m) off the ground.
- The top two rows of shelving units can go up to 7’ or 8’ (2.13 m or 2.44 m) high.
Once you’ve figured out the height you’d like your shelving units stacked at, take into account any leftover space in the garage itself. This might be from where you want to hang up bikes, tools, or other equipment.
When determining how many boards you’ll need for each shelf unit, keep in mind that larger boards will provide more support than smaller pieces. However, smaller wood may look better aesthetically if they’re cut cleanly.
You’ll have to figure out what works best for your needs and personal preferences.
3. Cut Boards From Pallets for Shelves
To create your shelving units, you’ll need to cut boards from the pallets that you selected.
Pallet wood is relatively easy to work with, and there’s no need for a saw if you don’t have one available to you. Typically, pry bars and crowbars will do just fine When cutting the boards, keep in mind that you’ll need two pieces for each shelf unit.
One will go on the front of the shelves, and one will go on the back.
4. Screw Boards Together To Create Shelving Units
Once you’ve cut each board to the proper length, screw them together. When screwing the boards together, go through one side and into the other. Leave just enough room on each end to place two more screws down into each shelf unit.
Also, make sure to secure the bottom of each board. You don’t want them popping up in the middle of a shelf, or worse yet, breaking completely off.
Here’s a video that may come in handy when making shelves out of pallets:
5. Secure the Shelving Units on the Wall
The last part of your project is mounting your shelving units on the wall. Make sure that it has been adequately leveled before you do this. Once it’s set in place, screw two screws into each bracket (one at the top and bottom) to ensure it’ll stay securely mounted on the wall for years to come.
Additionally, you can add brackets for support.
Place these on the upper and lower corners of your units where they meet the wall. Vary the location on each bracket per shelf unit, such as one in the top corner vertically and one in the bottom corner vertically.
This means that your last shelving units will only have one set of brackets instead of two. These are optional but recommended if you want added security when you start piling items onto your shelves.
Shelving units made from pallets are extremely sturdy already, but the added stability from brackets is always a good idea. You’ll still need to screw them into place securely, though.
Recommended Shelf Brackets
If you’re looking for quality shelf brackets to add stability to your shelving units made from pallets, there are several options available. However, finding the best shelf brackets for your needs requires some research to ensure you get the best quality possible.
That said, here are some shelf brackets from Amazon.com worth considering.
Premium Heavy-Duty Shelf Brackets
The Claimed Cornerstore shelf brackets are specifically designed to be used for heavy-duty applications. Their ¼” (6mm) thick steel construction makes them perfect for industrial or commercial use.
They won’t sag, bend, or bounce, making them an excellent choice if durability is a great concern. In addition, these brackets come with heavy-duty screws for quick installation.
Also, Amazon.com customer reviews claim that they’re far superior to other shelf brackets they’ve used in the past because of their ability to support much more weight without bending under pressure.
AWX Heavy Duty Shelf Brackets
These AWX shelf brackets are highly durable, so you can feel confident knowing they won’t break when holding your heaviest items. They’re also safe to use because they have rounded corners which protects against injury if someone accidentally bumps into them.
Rated for up to 600 lbs (272 kg) per set, these are great options for adding stability to your shelves created from pallets.
Also, they’re easy to install and come with a promise. You get a full refund if you spot any quality issues and contact customer support through Amazon.com within 31 days.
LuckIn 12-Pack Shelf Bracket for Floating Shelf
This LuckIn shelf bracket comes in a 12-pack, which gives you the option to mount more shelving units. Each unit can hold up to 250 lbs (113 kg) of weight simultaneously, so they’re suitable for most household applications.
These LuckIn brackets have a unique glass coating that prevents rusting and ensures durability. They also come with black screws and wall anchors for easy installation on any surface.
STARVAST 4 Pack Heavy Duty Shelf Brackets
These STARVAST shelf brackets are made of high-quality steel, which is what gives them their stability. They also have a unique triangular design for added support and come with screws and anchors to ensure that they remain securely mounted to your wall or floating shelf.
Their overall weight capacity is 66 lbs (30 kg) per set, so you can feel comfortable knowing they will never bend under pressure.
They’re easy to install and may be used for both indoor and outdoor applications.
Tip: Make sure the space between shelves is wide enough to accommodate whatever you hope to store on the unit. Also, check the stability of each shelf bracket by placing some weight on it. If you find any that are wobbly, tighten them or replace them with something sturdier.
Conclusion
In a nutshell, creating a set of garage shelves out of pallets is a quick project that offers a lot of benefits. It’ll help keep your workspace clean and organized and free up space up on the floor, so there’s more room for driving in and out of the garage.
You may even want to invest in multiple sets if you have a larger garage that would benefit from shelving units on each wall. This way, items don’t get lost or misplaced as often, and you won’t have to spend much time digging through piles to find things.
Sources:
How To Make a Pallet Shelf {DIY Shelf}
Easy-To-Craft Pallet Shelves With Customizable Designs
25 Best Pallet Shelves With Step by Step Plans
Chester Street Makers: Making Rustic Pallet Wood Shelves
Premium Heavy-Duty Shelf Brackets
AWX Heavy Duty Shelf Brackets
LuckIn 12-Pack Shelf Bracket for Floating Shelf
STARVAST 4 Pack Heavy Duty Shelf Brackets