Many times I have seen a project that I would like to replicate but just could not get the scale and curves right. After several attempts, it becomes just a bit frustrating that my artistic skills are not as good as my imagination makes me believe they are. One way to cheat this lack of talent is to use an existing image file.
Many people buy images off of the internet to use as a CNC pattern. Many CAD software programs can import an image and help you edit the result. Vector files are easy and ready to go but raster files may take a little work to make them compatible with the CNC software.`
The Difference Between Vector Files and Raster Files.
The first thing to understand is the difference between a raster file and a vector file. Before the image can be used, all of the graphics need to be converted to a vector file. My simplistic way of describing the difference is this: a raster file is made up of a bunch of dots whereas the vector file is made up of connected lines and arcs. Someone will want to point out that arcs are also a bunch of lines – well, in this case possibly but CAM software can translate a circle in far fewer lines of code.
When possible, it is better to find a vector file of the image you want to use in your CNC pattern. This will save a lot of editing time converting the raster image to vectors. Vector file extensions include:
- CRV – VCarve and Aspire
- DXF – Drawing Exchange Format
- DWG – Autocad Drawing File
- SVG – Scalable Vector Graphics
- EPS – Encapsulated PostScript
- AI – Adobe Illustrator
- PDF – Portable Document Format (can be raster also)
Raster files (also known as clip art) will have to be converted to vector and so will require a little more work after they are imported. Software like VCarve desktop and Aspire have tools to help with this conversion but I still find it faster to trace over the imported image using the vector tools provided.
Some raster file formats include:
- JPEG (or JPG) – Joint Photographic Experts Group
- PNG – Portable Network Graphics
- GIF – Graphics Interchange Format
- TIFF – Tagged Image File
- PSD – Photoshop Document
- PDF – Portable Document Format (Unless saved as a vector file)
- EPS – Encapsulated Postscript
- INDD – Adobe Indesign Document
- RAW – Raw Image Formats
- PSP – Paint Shop Pro (Coral Draw)
- XCF (Gimp)
- Photographs or anything scanned into your computer
The 5 steps I use to bring an image into VCarve Pro (and most Vectric Software) are:
- Select a Suitable Image
- Bring it into your software
- Scale it to fit your project
- Clean up the graphics
- Select Tool Start Point
Most CNC software will let you import an image so what I like to do is take a snapshot of the project and import it into CNC software. If I do not have something to take a picture of, I will search the internet for a free image to use. I use Vetric V-Carve Pro and I would imagine that many other mainstream CNC programs will also let you import images. Just understand that a photograph will be imported as a raster file.
NOTE: if you are selling the resulting product, please pay attention to the licensing associated with the image. In most cases, it is better to purchase the image with an appropriate license if you intend to sell the product.
Line Quality
Remember to keep the image simple. A lot of colors or too much detail will not translate well into a CNC Pattern.

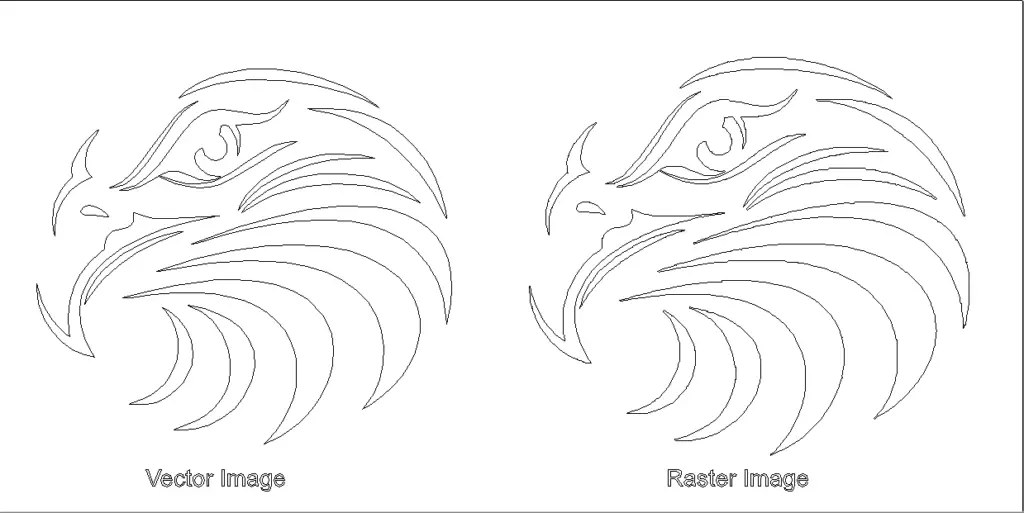
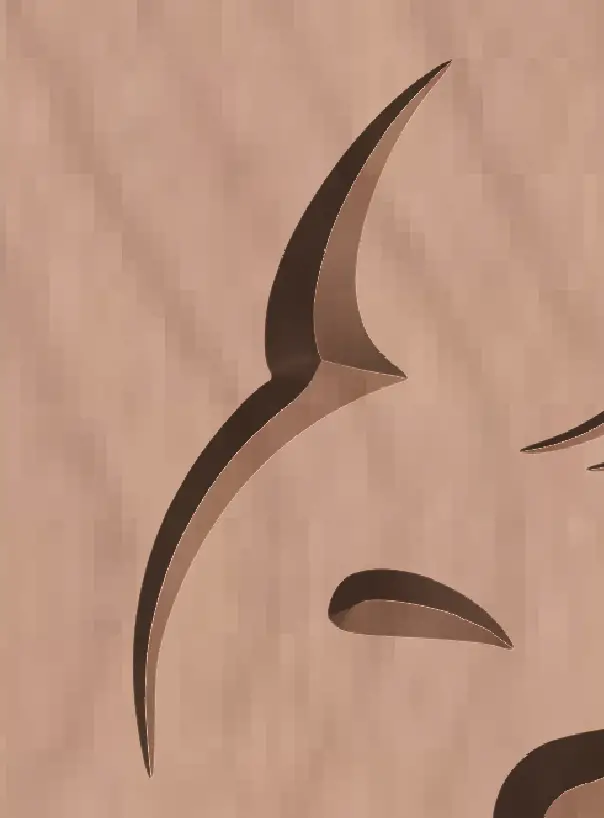
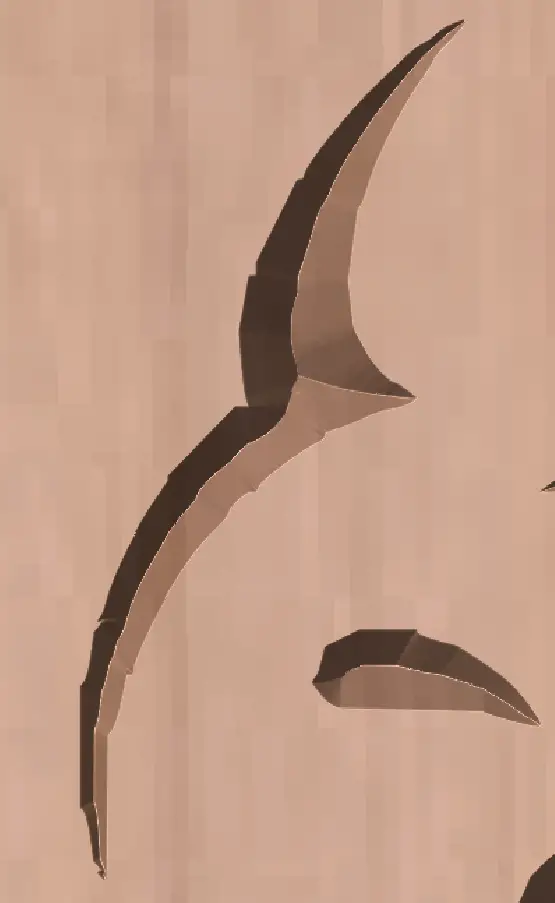
The graphics in the images above are the same line art. You can already see that the raster file has some rough edges. The raster files was a .jpg file and the vector file was a .svg file.
The next thing is to size the image to the scale you want. I will measure the length of the piece I want to carve and set up my job to accommodate that size. Of course, the image will – especially is taken by a cell phone – will come out huge. This can usually be taken care of by scaling the image. This is why it is important to set up your job to the length you desire first. Simply scale the image to the dimensions you desire.
Opening the File
Again, I have experience with only one software but I have to think that even the most basic CAD/CAM software will allow image imports roughly the same way. File>Open. This will only find vector files in the folder. Raster Files cannot be opened this way (In VCarve). In VCarve Pro, simply opening the image will size the workpiece accordingly to fit the image.
Optionally, I can start a new file: File>New. This way, I can set the work area to a predetermined height and width. After the work area has been set, I can then import the image: File>Import> Import Vectors.
Notice that when I import an image in several formats if I import after the work area has been defined. Importing will not distinguish between raster and vector files.
Scaling the File
Scaling is rather simple in VCarve. Vector files will have to be selected all at once. Usually the vectors will change color. In VCarve, a second click on the entities will open a sizing box around the extremes of the image.
Pull points in the corners will scale with the aspect ratio locked (the edit will scale in all directions proportionally). Pull points in the middle of each side will distort the image by pulling in only one direction. In addition, a second pull point in each corner will rotate the image.
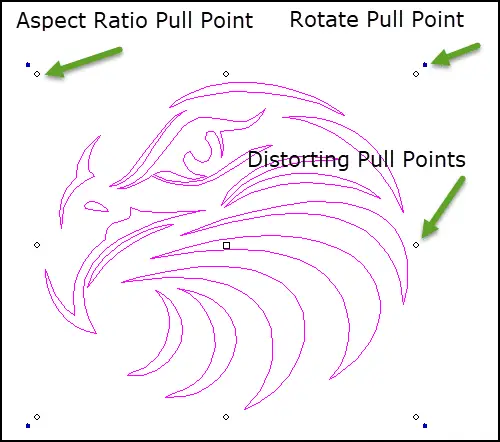
If you want to scale the image file before it is converted to vectors, the image can be selected with one click. The software still sees the image as one entity. All of the same pull points are available for bitmap images.
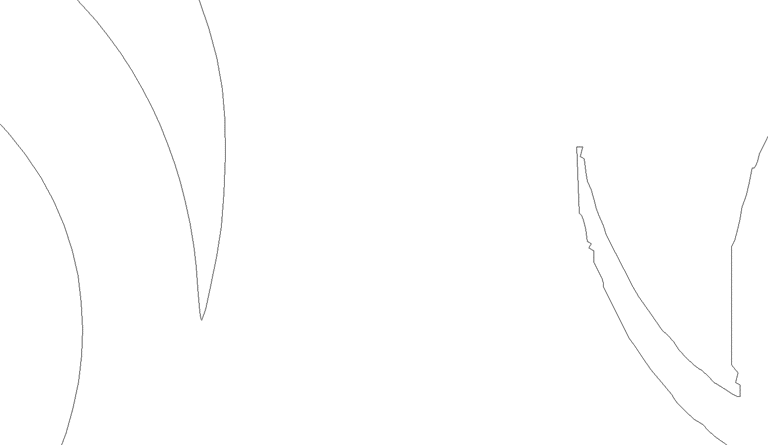
One last parting thought. Raster files that have not bee smoothed out will produce jagged edges. The tool is going to follow the paths created by the bitmap as shown in the image above.
Vector files, on the other hand, will create smoother edges. This will also mean a faster cut time. Each time the CNC encounters a corner, it essentially stops. Here are 2 close up images of the predicted tool path from VCarve Pro.
Trace Bitmap
In most CAM software there is a “Trace Bitmap” function. I am using VCarve so some other software might call it something different. Basically, this is a way to convert a raster image into vectors.
This is done by detecting color changes and offering lines where those changes occur. Again, this is easiest done with a black and white image but can be done on any image. The software should allow you to choose how fine of color resolution you want to detect.
One thing to be aware of when converting a raster image is that what you might think of as a line in the raster image really has 2 edges where color change exists (actually 4 edges because the ends of the lines will be detected also.)
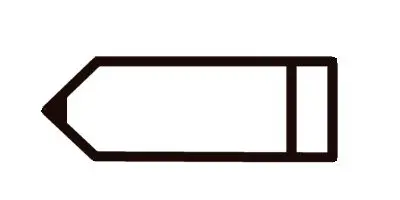
For example, this simple representation of a pencil that I created and saved as a raster (.jpg file) was imported into VCarve. I then ran the Trace Bitmap operation on the image. What was “lines” in the bitmap was traced with vectors around all edges of the original image resulting in an inside and an outside image.
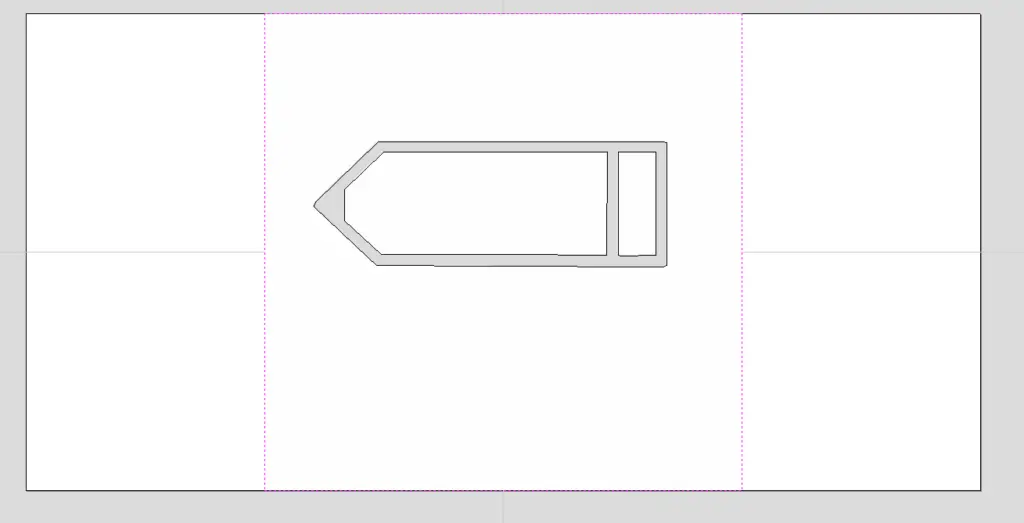
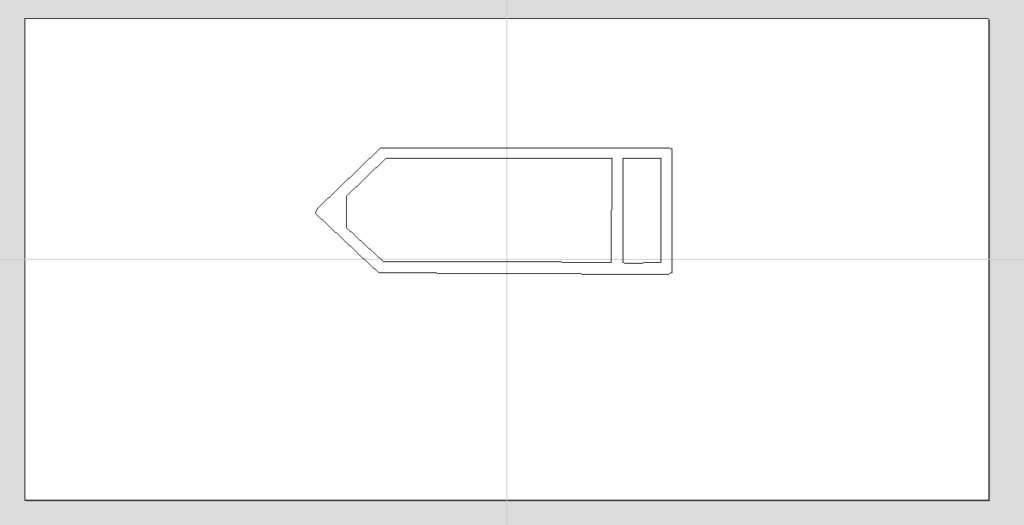
All this is to say that a raster image might not translate how you thought it might in your CAM software. This is certainly not a show stopper but we need to understand why this happens to be able to work with it.
In Conclusion
Imported images can give our CNC many things to work on. There are so many websites that offer free and low-cost images that we may never have to come up with our own.
Importing bitmap and vector images will have varying degrees of results. Your CNC will be able to navigate a smooth path faster than a path with many changes of direction. Therefore, when a bitmap is traced, it is important to clean up the edges and remove as many imperfections in the new vectors as possible.